Thursday, July 25, 2013

It is our anniversary!

Happy anniversary! It's us being together for 3 years, and I do hope we have infinite 3 years to come in the future. May we be blessed with strength to walk, hand-in-hand, for the rest of our lives. Muah baby! :*

You and me, I love you!

Wednesday, July 24, 2013

CY went shopping again..!

An excuse to help my dearly father get raisins to visit the baking supply shop near my home to see what can I get for my mini-foods! 

This...
Oval shape cutter on sale! I modified it into a round shape,
which I needed badly.

Then...
One of my new piping tips! Trying them out while
adjusting the tip heads.

Oh yes... and an aluminium tray specially for baking clay so I would stop wasting more aluminium foils. The next thing would be getting an oven just for clay if I'm serious in making them for long... Much debate on whether polymer clays are toxic or not; but better be safe than sorry!

2.28 AM now! I spent too much time making my new batch of mini-food I guess. Good night to everyone!

Tuesday, July 23, 2013

Food update

Two updates from me on food! An opera cake, and a failed pizza. Pizza was done just because I saw there was a big chunk of yellow left in my scrap box. :P
Opera cake.

Super cheesy vegetarian pizza. I failed this.

Monday, July 22, 2013

Animals for sale

Introducing.... M! M is a bitchy sweet cat owned by my elder sister. And since my sister suggested to sculpt a "M" for her so she could put it on her office table, I made my very first attempt to try sculpting a real cat (instead of some cute cartoony animals). Not alike but still cute! 
The cat. 

Next up, my friend Laura requested an elephant sculpted for her; so this is what I made for her... I really hope she likes this! An improvement from the previous cat, hmm!
Elephant sculpting. [reserved]

Sunday, July 21, 2013

D.I.Y. needle and ball tool

CY's needle and ball tool.
Material:
1. Needle with ball head of desired size
2. Cutting pliers
3. Gripping pliers
4. Hot glue stick
5. (Optional) Decoration, e.g. silver wire (in my case).

What did I do:
1. Break the needle into half with cutting pliers, with short part of needle left attached to the ball, and few cm left on the sharp end.
2. Using pliers, push the needle/ball head into the glue stick at each end of the glue stick. Adjust your needle length as needed.
3. Decorate the glue stick if you'd wish. 

Tips:
* Glue sticks are soft and flexible, so consider strengthening the core to reduce flexibility.
* While pushing the needle in, check on the insertion tract of the needle (if your glue stick is transparent) so it will not deviate and exit from the glue stick.

Thursday, July 18, 2013

Organised!

Got myself a collection box at Daiso Japan. Again I would like to say that Daiso is such a wonderful place! (:

Organised finally!
Been lazy on clay these few days, doing some other serious businesses instead. Any idea what else can I craft? Please comment and thanks (:

Wednesday, July 17, 2013

Mold making... failed?

Thinking that I might be making more mini-foods in near future, I thought it'd be good to make some molds for these plates and bowls, which are essential in displaying my mini-food. The process was slightly more complicated than normal plate making processes without molds, but sure enough it will be sustainable for a long run and give you a standardised plate/bowl. 

Plates and bowl. The shapes are a bit off though. 
Without Amazing mold putty or silicone mold maker that I can find in Malaysia, and Sculpey mold maker is so expensive, I decided to use some scrap clay to make these molds. I adapted a few tutorials to make these. Problem with scrap clay mold is that they are not flexible, so your raw clay will likely get stuck inside the mold if you press too hard and deep in. I suggest to brush the mold with water before you stuff your clay in and the clay will fall off easily. Cornstarch seems to be useful but I find it hard to pull than using water; also they tend to leave my clay powdery after curing...


And this is also another mold made from toothpaste cap for cupcakes. Also made of scrap clay, and certain clays just didn't want to part with my mold... ):

Small cup made from mold. Cute??
Of course dedicated materials for molds are still the best things to have but if you're out of budget, I guess this are some things that you could try! Oh and here are some other alternatives:
Jello-molds made of gelatin and glycerine: here.
Hot glue gun mold: here.
Silicone mold: herehere and here.
Using air dry clay: here.

Let me know if you tried them.

Breads

It feels like a bready day today so I made a loaf to be served as breakfast ;) Mini-food are made easier when you have chalk pastels, seriously. This is especially true for items that should look baked, like breads, and pies.

Sandwich loaf.

Oh and not to forget these baguette and croissants made few days back. This was made based on a request by a sweet friend from France. I hope she enjoys these.

French baguette and croissants.

Monday, July 15, 2013

Mini-food update

Food update for the week. Had been doing these for the pass week other than my pizza and BBQ platter. Enjoy.

Garden salad. One of my favourites.
Salmon rose platter.
Rainbow trout. Raw. Tutorial here.
Breakfast platter. Too much bacon? And bad colour
on the egg xD
Failed spaghetti. Too much sauce and meats.

BBQ party!

Last Sunday we were planning a BBQ party to celebrate my sister's birthday... but it was then raining so we had to make a "frying party" instead with pizzas as main dish. Still nice I'd say, but all the food lacked the BBQ smoke that made them tasted different. :/ 

Mini-foods updated the next day - BBQ platter and a pepperoni pizza!

Steak, hot dog, a burger and a skewer. p:

Pepperoni pizza, a realistic one.

Above made by adaptation to ToniEllison's tutorials;
Tutorial on making realistic supreme pizza: here.
Tutorial on making backyard BBQ set: here.

Sunday, July 14, 2013

The power of chalk pastel

Chalk pastels!
Got these pastels from my sister, who used them to dye her hair (ughh..?). Saved me some juices! (You can get cheaper one at Daiso Japan for RM 5 with 18 colours, anyway) Polymer clays pick up chalk pastels pretty well unlike others. And below will be some magic done by the chalk pastels. 

Before.
After.
I have to admit that my skills are really... really bad. Colouring was one worst nightmare during art classes 10 years ago, and it still is. *blush*

Brush brush brush... time to brush up my skills!

In memory. . .

Our beloved hamster, Kirby, had left us early in the morning at 5.18 am, March 5 this year. We still miss him, and we would like to tell the world that Kirby was one of its kind, my best hamster so far with its cute personality and love for us.

His favourite spot.
The picture of him sleeping in its favourite corner is one of the cutest pictures my boyfriend loves about. And we all know that he is happy over the rainbow bridge now. (': I made two little figurines for my boyfriend - he loves him more than me..!

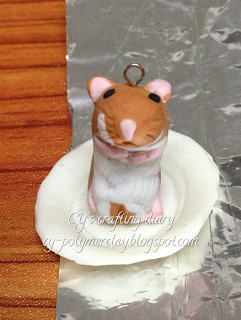
The usual sneaky and greedy hamster :P
My boyfriend then made another one standing (below). Well, he was kinda good considering that he was a total beginner to clay (first time touching these clays)... And I did some final touch-ups for Kirby before he felt really happy and obsessed with his new mini-boy.
Standing Kirby.

Saturday, July 13, 2013

So why am I into clay...

That sounds a little wrong. Me? A vet..? Into such things where I was never good at (arts)?! Hah! How did it begin? Well.. Well... All because of a souvenir! That's right, a souvenir for my supervisor cum lecturer who gave me too much of guidance and help throughout my final year. (: 

I didn't know what to give, and giving some standard souvenir will look lame and somehow cheap... So I asked my sisters, and then Googled a little and found out that I might be able to do some figurines for him!

A prototype made from Play-Doh. The colours faded after 2
weeks so I decided not to embarrass myself with it. 
Not only because the colours faded like ewww... I also disliked the acrylic sealant effect, my pigs looked like they soaked themselves in oil or something. Yuck.

La la la... Still the first one looks better with a brightly coloured mushroom. The fact was that I didn't want to make all the pigs to be appraising a funny mushroom... Haha. So I made them again but on a flat greeny land, and scattered the roses around. Now they look more like enjoying in a park rather than wondering what a mushroom really is, eh? (But it does look a little duller.. Hmm...)

The real deal! Three piglets sitting together on a grass land. TQ to my lecturer!

That's it. That's how I started my hobby. Strange enough to pick this up at this age. Maybe I am just too free at home after graduation...


Why I love Daiso


The reason is obvious. There are just things that you can get at half the price out there; though you may get reversed situations at times. So my wishlist is fulfilled at the price that I am willing to pay.

If you guys can recommend cheaper tool supplies, please comment below :)

Friday, July 12, 2013

Cane update

First two canes made by me.
Lemon and kiwi canes. Not bad for a beginner :P
To be honest the kiwi cane looks very nicely done... but only that the centre was too opaque. That was done when I had no access to translucent clay, so yeah... May redo but depends! I am lazy! :D

Thursday, July 11, 2013

Pusheen the cat

I'm sure most of us know what Pusheen is thanks to Facebook stickers. So my friends spontaneously suggested that I should make a Pusheen cat from clay.

Pusheen: meow!

Tutorial here.
(Psst, I am still learning from tutorials, simply because I'm still a newbie! Need more practice...)

Tuesday, July 9, 2013

Tutti Frutti series


Yoghurt! Frozen yoghurt!
Size: 1 - 1.5 cm diameter.

Adapted from ToniEllison's tutorial.

An improved tool basket


Just a picture to show off my tools. Of course I am no where near an expert but I guess that shall suffice for a beginner. See some new colours? I got them at half the price cheaper from a lady (Shirly Yong) in Setapak, KL. The price is about RM 5 for a 50 g block and cheaper if you get them in 250 g or 500 g blocks.

Others are just some other tools, including two blades and a needle tool that were ugly-ly decorated with scrap clay. My current wishlist would be an art knife and a cutting mat (which is like RM 20-ish in local stationery shops)... And till then... Happy crafting!

Sunday, July 7, 2013

Cupcake #1

Chocolate cupcake with strawberry topping.
Size: 1.5 cm diameter.

Friday, July 5, 2013

Chocolate cake slice


Chocolate cake slice. 
Length: 2.5 cm
Tutorial here by tillylovescraft.

Wednesday, July 3, 2013

*struggles*

Though happy with my new clay haul the day before, I found it very difficult to play with the real polymer clay! The Kato Polyclay is extremely hard to knead with fingers and I ended up using a hammer. My first attempt was to make a cute little dinosaur polymer clay charm like here. But l gave up finally... And made a Play-Doh version of a kawaii dino instead!

First and failure.
So I know from here that I have not been conditioning my clay well. And that these clays are really, really hard to condition. (T_T) More effort next time!

New (true) artisan in the making!

Hello everyone... Ta-da! My new toys!

Got my polymer clay supplies from Multifilla art & craft material supplies warehouse at Seri Kembangan. And some other crafting items as well, some from junk yard (lol), and some stolen (LOL).
FIMO is a well-known brand for polymer clay, on par with Sculpey (Premo), and Kato. But these are not cheap! Be prepared to spend a lot (and I mean like, a lot) if you want to buy these branded clays in Malaysia. One block of 56 g FIMO/Premo/Sculpey will cost you from RM 9.50 to RM 10.00.

My clays!

Tuesday, July 2, 2013

Happy birthday!


Little giraffe is on a secret mission. He needed to dedicate this slice of cake to a friend of mine, wishing her a happy birthday! Also to all the birthday girls/boys out there :)

(Giraffe tutorial by Inspees)

Dessert time!

A macaroon made from this "recipe" by funkypinkgirl, only that it was Play-Doh instead. 
It was really easy to make so give it a go!

A not-so-yummy pink red velvet cake. 
Diameter about 2.5 cm (1 inch).

One of my proudly done Play-Doh creations - a black forest cake slice! (about 2 cm by 2 cm)
I rolled out the chocolate slices one by one and paste them on to make them more realistic.

I hope you like them too!

Monday, July 1, 2013

Spot the banana!


Ba-nana? In conjunction with the overwhelming craze over Despicable Me minions, I made a banana for my minions as well. Whatcha think about my banana? Mind you guys it's made of Play-Doh, one of my very first few creations. Enjoy the potato-O-o, oops, I mean, banana. :)