Today I will be fulfilling my promise to write a review on the oyumaru I recently acquired from the art supplies. With that I will be doing the review by making some molds for plates and bowls, which are essential for miniature food makers. The plate and bowl shapes were inspired by
SugarCharmShop.
Before everything, make a few plate/bowl bottoms using scrap polymer clay and bake accordingly. Cool the polymer clay before use.
 |
| 1. Pre-baked plate, bowl, and cup bottoms. |
Then, heat up some water in a pot to a minimum of 80 degree Celcius. Pop in the oyumaru and leave for few minutes (depending on the thickness of the oyumaru bar).
 |
| 2. Heat the oyumaru in hot water. |
Using a pair of chopsticks or skewer (or anything you'd wish), pull out the oyumaru. The oyumaru should be easily bent or changed in shape when taken out. Drain the hot water away using a towel or a paper towel.
 |
3. Drain the hot water using paper towel. I'd recommend towel as this piece
of oyumaru tends to catch bits of the paper towel. |
Next, quickly knead the warm oyumaru into a ball and remove possible air bubble trapped within. Smooth out the ball to avoid cracks in the mold later.
 |
| 4. Knead oyumaru into a smooth ball while it's warm. |
Flatten the kneaded oyumaru slightly or to fit to your desired mold shape. In this picture I flattened it pretty much to make a plate mold.
 |
| 5. Flatten the oyumaru to fit the item to be molded. |
Press the plate/bowl/cup into the oyumaru (while it's warm) while making sure the oyumaru wraps tightly around the item. Then, flatten out the excess oyumaru around the item to make the mold thinner (increasing its flexibility later).
 |
| 6. Press in the item to make the mold. |
I always like to flip the molds over and flatten them again to have a smooth and thin top surface around the mold so it will be easier to pull out my products later.
 |
| 7. Flipper over for a smooth top. |
Wait for 20 minutes to cool the oyumaru down. Do not pull the item off when it's still warm or the mold shape will be distorted. If you're impatient, run tap water on the oyumaru to speed up the cooling. After the oyumaru is cool enough, gently remove the items from the molds.
 |
| 8. Plate, bowl, and cup; and their respective molds. |
And, done!
Now let's try to make a cup out of it. I pushed a small ball of scrap clay into the mold, and used a ball tool to make the cup shape.
 |
| Raw polymer clay in mold, shaped using a ball tool. |
I tried to pull the clay out, but with no success as the cup was too thin, and that the shape would be destroyed when I tried to pop the cup out by flexing the oyumaru mold. As such, I'd recommend some releasing agent (baby oil, cornstarch, or water if it suits you). You can also put them into freezer to harden the clay a little. Alternatively, like me, I popped the oyumaru back into boiling water for another 5 minutes to semi-cure the polymer clay before cooling and popping it out. But this also means that your mold will have to be remade afterwards.
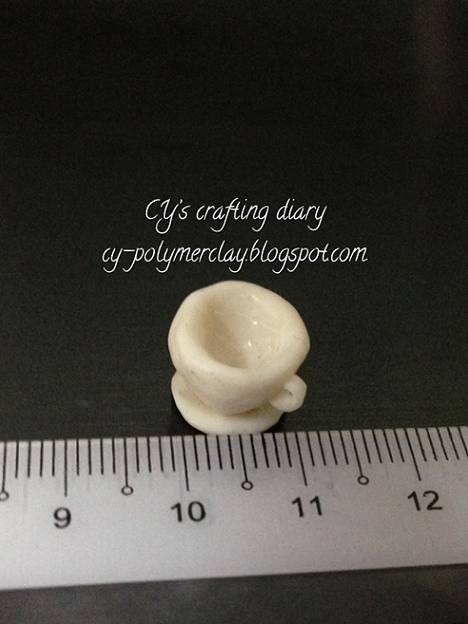
Then the cup was sanded a little to make it more presentable. The cup shape was a bit off on the top, which means that my first cup for the mold wasn't good enough (see the rounded edge on the top edge). Will improve on that!
 |
| The mold, and the cups. |
Notes after using oyumaru:
- Cheap when compared to Silicone putty (nearly RM 100 here?!).
- They are reusable. This makes another strong point to save some money - not happy? Just reheat it.
- If you leave the oyumaru in boiling and bubbling water, your oyumaru will likely trap the bubbles and will look bubbly as well after.
- The flexibility of the oyumaru is acceptable, but less so when it's too thick. So always try to have a flattened out area so you can flex the mold better.