Showing posts with label tools. Show all posts

Sunday, July 12, 2015

CY's shopping spree

Just two weeks ago I had a trip to Weststar Art Shop (Taman Melawati) to buy some supplies for my crafting hobby. To be honest, everything seemed so attractive that I want to buy all of them! Eventually I bought A few more mini glass jars, a new set of acrylic paint, and some other little things...

More dotting tools!

A stainless steel palette (?) for my liquid clay and/or acrylic mixing.

And then I went on e-shopping at Malaysia Clay Art (mind you I am broke, but still!). I bought a set of mica powder for my clay project and I find this really really useful in adding a metallic finish to my artwork!
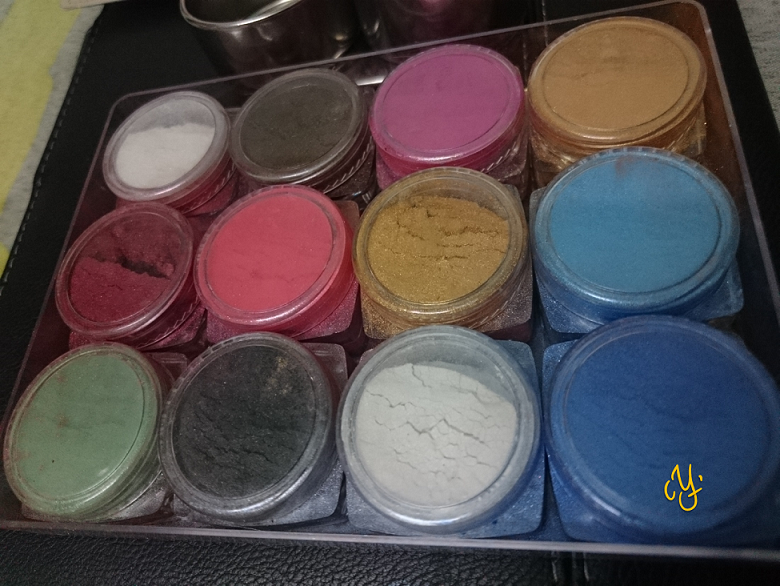
Mica powder. RM28 for 12 colours. A little goes a long way!

Topping up supplies - brown and silver clay blocks. RM 6 for a 60 g block.

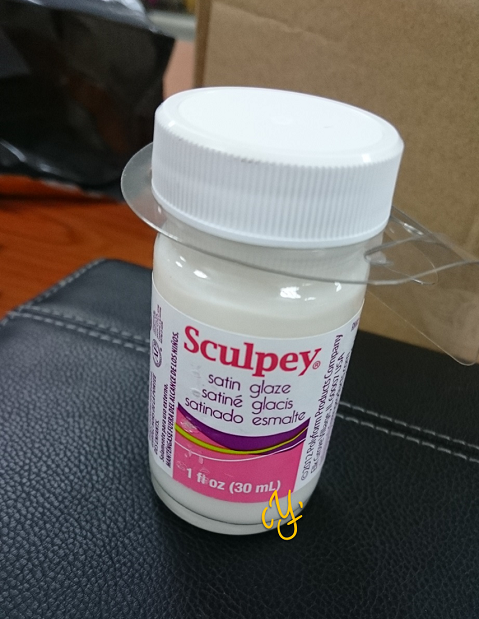
Sculpey Satin Glaze (Matte) - RM 24;
Not very matte when used side-by-side with my FIMO gloss varnish.

And then finally I took a turn in Daiso. What saddening was that they seemed to stop carrying acrylic paints; I couldn't see any in Daiso @ IOI City Mall; and the Daiso @ AEON Taman Equine only had a few tubes of a same colour left.
Anyway, it was interesting to note that I found a Daiso-branded "polymer clay"! According to some reviews on Youtube these are not polymer clay but more of resin clay, and the curing does not require oven. I bought one just to try - and I might write a review on that later. Stay tuned!

The "polymer clay" (resin clay) - RM 5.3 for 30 g.

Alright, time for bed tonight! See you guys around next time ;)

Saturday, July 19, 2014

Work surfaces

I had been using a piece of tile to work my projects on, which served me quite well as it can be put into an oven together with the object without the need to transfer and thus risking to distort my figures. But ever since I moved, I left my old tiles at the old place and came here to find my scrap tiles are all of irregular surfaces. ):

So I had been working on a sheet of plastic wrapper pasted on my table all these while, like this;

While the plastic tears easily especially when cutting/slicing, the plastic sheet also tend to move/fold around when I rolled my clay pieces. So I went to Art Friend @ The Curve to look for surfaces to work on. Few choices I found to be rather useful - glass (RM 4.2 for a 15 x 15 cm piece), acrylic sheets, and finally polypropylene sheets. The glass is useful to directly build the pieces right on top and then send them all into the oven, but I did not purchase it as I have a specific aluminium baking tray for baking clay projects. 

Rummage... rummage... rummage... I finally found my work surfaces!
(To know which type of plastic material that can be used in contact with polymer clay, please refer to Garie's research with super detailed descriptions and photos.)

From the left: Acrylic sheet 2 mm, clear PP sheet .2 mm, and patterned PP sheet .3mm; all A3-sized.
The most useful work surface is the acrylic sheet (a.k.a. plexiglass) which was priced at RM 9.9 from Art Friend. It is rigid and clear, and I can easily slip a piece of paper with important measurements underneath to facilitate cutting/length estimation. Polypropylene (PP) sheets are much cheaper (RM 2 or less) to work on, however with only .2 mm thickness and the light-weighted property, fixation onto a table may be needed. Be careful if you are cutting the clay pieces here, as they can be cut through with a blade. While glass is more superior in this matter, the size offered was too small to make it worthwhile.

Update: Try checking out Ikea's glass shelf - Hemnes 44 x 30 cm for RM 10! Sounds like a better deal for this "off-label" use lol. 

Meanwhile... A curious cat decided to take a bite on the sharp edges.
So there you go, my updates on work surfaces. I still think tile is one of the best surfaces to have, but I also love the convenience of measuring my clay projects under the transparency of the acrylic sheet. I guess an A3-sized tempered glass surface would be my best bet to get the combined features huh? :P Which surface do you like to work polymer clay on? Let us know in the comment box below. Till then, have a blessed weekend and happy crafting. (:


Thursday, July 10, 2014

Updates on Projects and Purchases

Good morning! Was busy but I managed to have some fun stuffs done in between my schedule. Let's get started.

Mini chocolate shaver, RM 2.5 from local baking supply shop
Found this cute chocolate shaver in a local supply store while buying some baking trays and the first thought coming to my mind was "this is definitely designed for miniatures" xD Well, it definitely can be used to shave some chocolate toppings on cakes, and in this case, the polymer clay miniature cakes.

Mini glass bottles and fitted corks, RM 8.8 for 10, off eBay.
Time for charm in a bottle! Been looking at ideas on bottled charms for some time and thought I could starting creating some really small charms in small bottles like this. Purchased these 24 x 11 mm glass bottles from China seller at a cheap price off eBay Malaysia and will be showing you the first (trial) bottled charm below.

Ta-Da! The first (but ugly) trial in making a bottled charm.
There you go! My first bottled charm made with a coconut tree on a small lonely island. The bottle was filled with glycerine and then sealed with glue. The glycerine distorted the coconut tree a little to look stumpier and shorter. I too have a problem making the sea look "right"; where I used translucent clay with a tinge of blue clay, but it did not look translucent at all... To be honest I had some difficulty sourcing resin... They are not cheap when it comes to EasyCast or similar things here (talking about something more than RM 50.0) in the local art supply stores. And beading.my has stopped selling epoxy resin ever since they fully converted their business to online store. If you guys have any idea where to buy epoxy resin at an affordable price, let me know!

Second master piece - bird in a bottle, diameter about 1 cm.
Reference here

A small teaser:
To be revealed. . . . . 
This would be a big one! :P I still need to make up some more detail and to add one more character into it to call it done. So stay tuned!


Sunday, September 8, 2013

Shopping.., again!

I was looking for oyumaru all around when I finally came to know about the reusable features of these plastic compounds, but after looking around in Daiso @ the Curve, and several others in Klang Valley, I finally gave up and took my trip to Multifilla at Balakong, and then dropped by at the Mines' Daiso again just for a cooking pot.
All stuffed into a pot!

Now let's go through one by one. . .

Oyumaru, packed in DIY sushi packs.
On a closer look this would be my packs of oyumaru. Multifilla sells two bars in a packet at RM 7.50; but my kind boyfriend (smart enough) pointed to these sushi packs and asked if these were also oyumaru to make sushi ("so cute!"). So it crossed my mind to take these instead, since I will get 3 bars in the pack at the price of only RM 8.50.

Will be writing a tutorial and/or review on these oyumaru later on.

(EDIT: Good news for everyone out there was that I actually found oyumaru in the Daiso of the Mines! It's at RM 5 for two. *growls* Check out the stationery section. It would be hard to find as it was small, and hung along with other not-so-relevant stuffs.)

Cooking pot from Daiso. RM 5 only.
So the cooking pot is what I will be using for boiling my oyumarus. Just to be safe as to not use the same pot for cooking.

Finally determinedly bought TLS. RM 28. Phew.
And thanks to my trip to Multifilla where everything for clay seems so interesting... And that this item was hung right above the oyumarus... Finally, I got my hands onto TLS that I have been longing for! Sauces, cream, and everything, wait for me! Yay! I am not really sure of the price of TLS in Artfriend, but if you know, please let us know so we could compare them. :)

The old Fimo soft bar in 25 g.
And finally a gold bar on sale for RM 5 each. Took one to keep just in case I start to make some metal-coloured stuffs. These are old old bars, thus on sale; but nonetheless conditionable (though time consuming).

Anyway, I figured that my rate of polymer clay projects production are far slower than my purchasing rate! Ouch! I should be controlling myself so I don't get into financial trouble before my pay comes! :P

Till then, peace!

Sunday, August 18, 2013

Flat even pieces?

If you do not have a pasta machine... And are trying to get some even pieces, e.g. making cake slices, etc... Read on.

(No money for pasta machine...)

The trick is simple... Just put two objects of even thickness to both sides of your clay and then roll them on!

You may have pieces of cardboard stuck together, or decks of cards (similar number on each side); basically anything as long as you have them both similarly thick, and roll the clay with rolling pin...

Cardboard? Cards? Foam? Anything under the sky!

End product, tada! So no more excuses for uneven pieces. Hee!

Rolled away!

Good luck trying!!

Wednesday, July 24, 2013

CY went shopping again..!

An excuse to help my dearly father get raisins to visit the baking supply shop near my home to see what can I get for my mini-foods! 

This...
Oval shape cutter on sale! I modified it into a round shape,
which I needed badly.

Then...
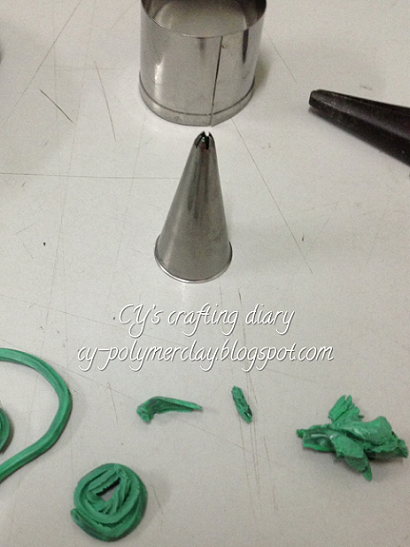
One of my new piping tips! Trying them out while
adjusting the tip heads.

Oh yes... and an aluminium tray specially for baking clay so I would stop wasting more aluminium foils. The next thing would be getting an oven just for clay if I'm serious in making them for long... Much debate on whether polymer clays are toxic or not; but better be safe than sorry!

2.28 AM now! I spent too much time making my new batch of mini-food I guess. Good night to everyone!

Sunday, July 21, 2013

D.I.Y. needle and ball tool

CY's needle and ball tool.
Material:
1. Needle with ball head of desired size
2. Cutting pliers
3. Gripping pliers
4. Hot glue stick
5. (Optional) Decoration, e.g. silver wire (in my case).

What did I do:
1. Break the needle into half with cutting pliers, with short part of needle left attached to the ball, and few cm left on the sharp end.
2. Using pliers, push the needle/ball head into the glue stick at each end of the glue stick. Adjust your needle length as needed.
3. Decorate the glue stick if you'd wish. 

Tips:
* Glue sticks are soft and flexible, so consider strengthening the core to reduce flexibility.
* While pushing the needle in, check on the insertion tract of the needle (if your glue stick is transparent) so it will not deviate and exit from the glue stick.

Saturday, July 13, 2013

Why I love Daiso


The reason is obvious. There are just things that you can get at half the price out there; though you may get reversed situations at times. So my wishlist is fulfilled at the price that I am willing to pay.

If you guys can recommend cheaper tool supplies, please comment below :)

Tuesday, July 9, 2013

An improved tool basket


Just a picture to show off my tools. Of course I am no where near an expert but I guess that shall suffice for a beginner. See some new colours? I got them at half the price cheaper from a lady (Shirly Yong) in Setapak, KL. The price is about RM 5 for a 50 g block and cheaper if you get them in 250 g or 500 g blocks.

Others are just some other tools, including two blades and a needle tool that were ugly-ly decorated with scrap clay. My current wishlist would be an art knife and a cutting mat (which is like RM 20-ish in local stationery shops)... And till then... Happy crafting!